01Sep

The True Post-Production Process

By, September 01, 2023

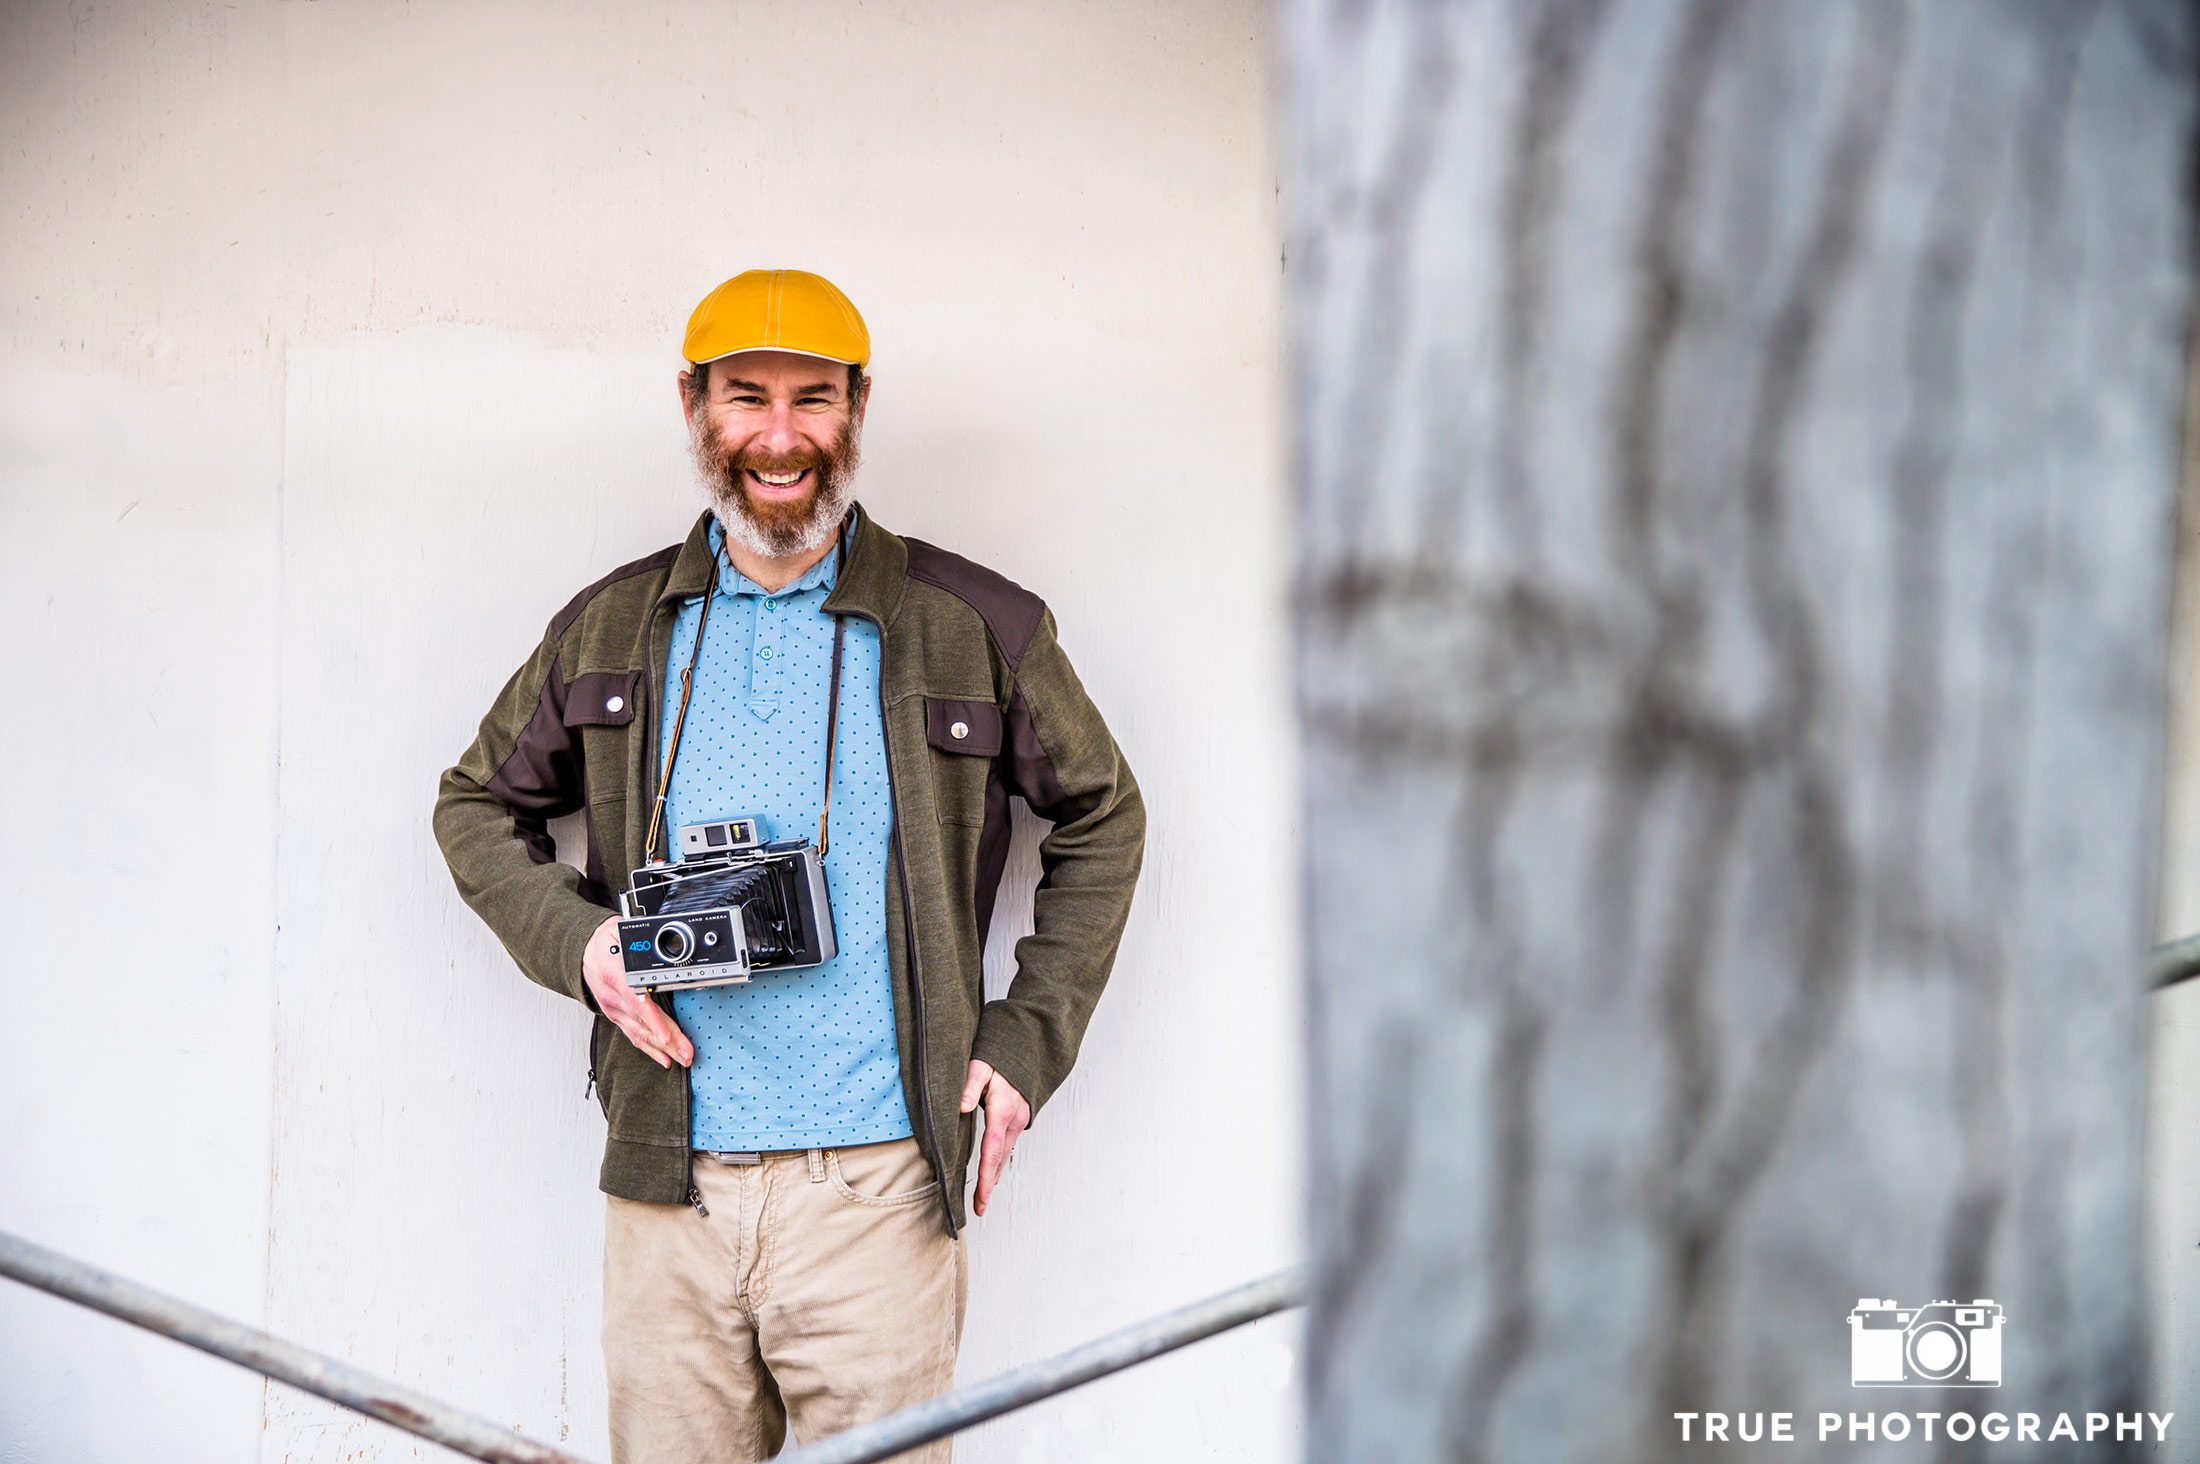
To ensure your photos represent the “True” style, they (Best Photographers in San Diego) undergo hours of hands-on care and attention. Our post-production process starts with an amazing photograph. We then take that photograph and bring out the very best within the image. These refined techniques really showcase the art and style of each photo, ensuring that the images will remain timeless, with that extra oomph :) 

This post will walk you thru all the steps taken with the “best of the best” images. 

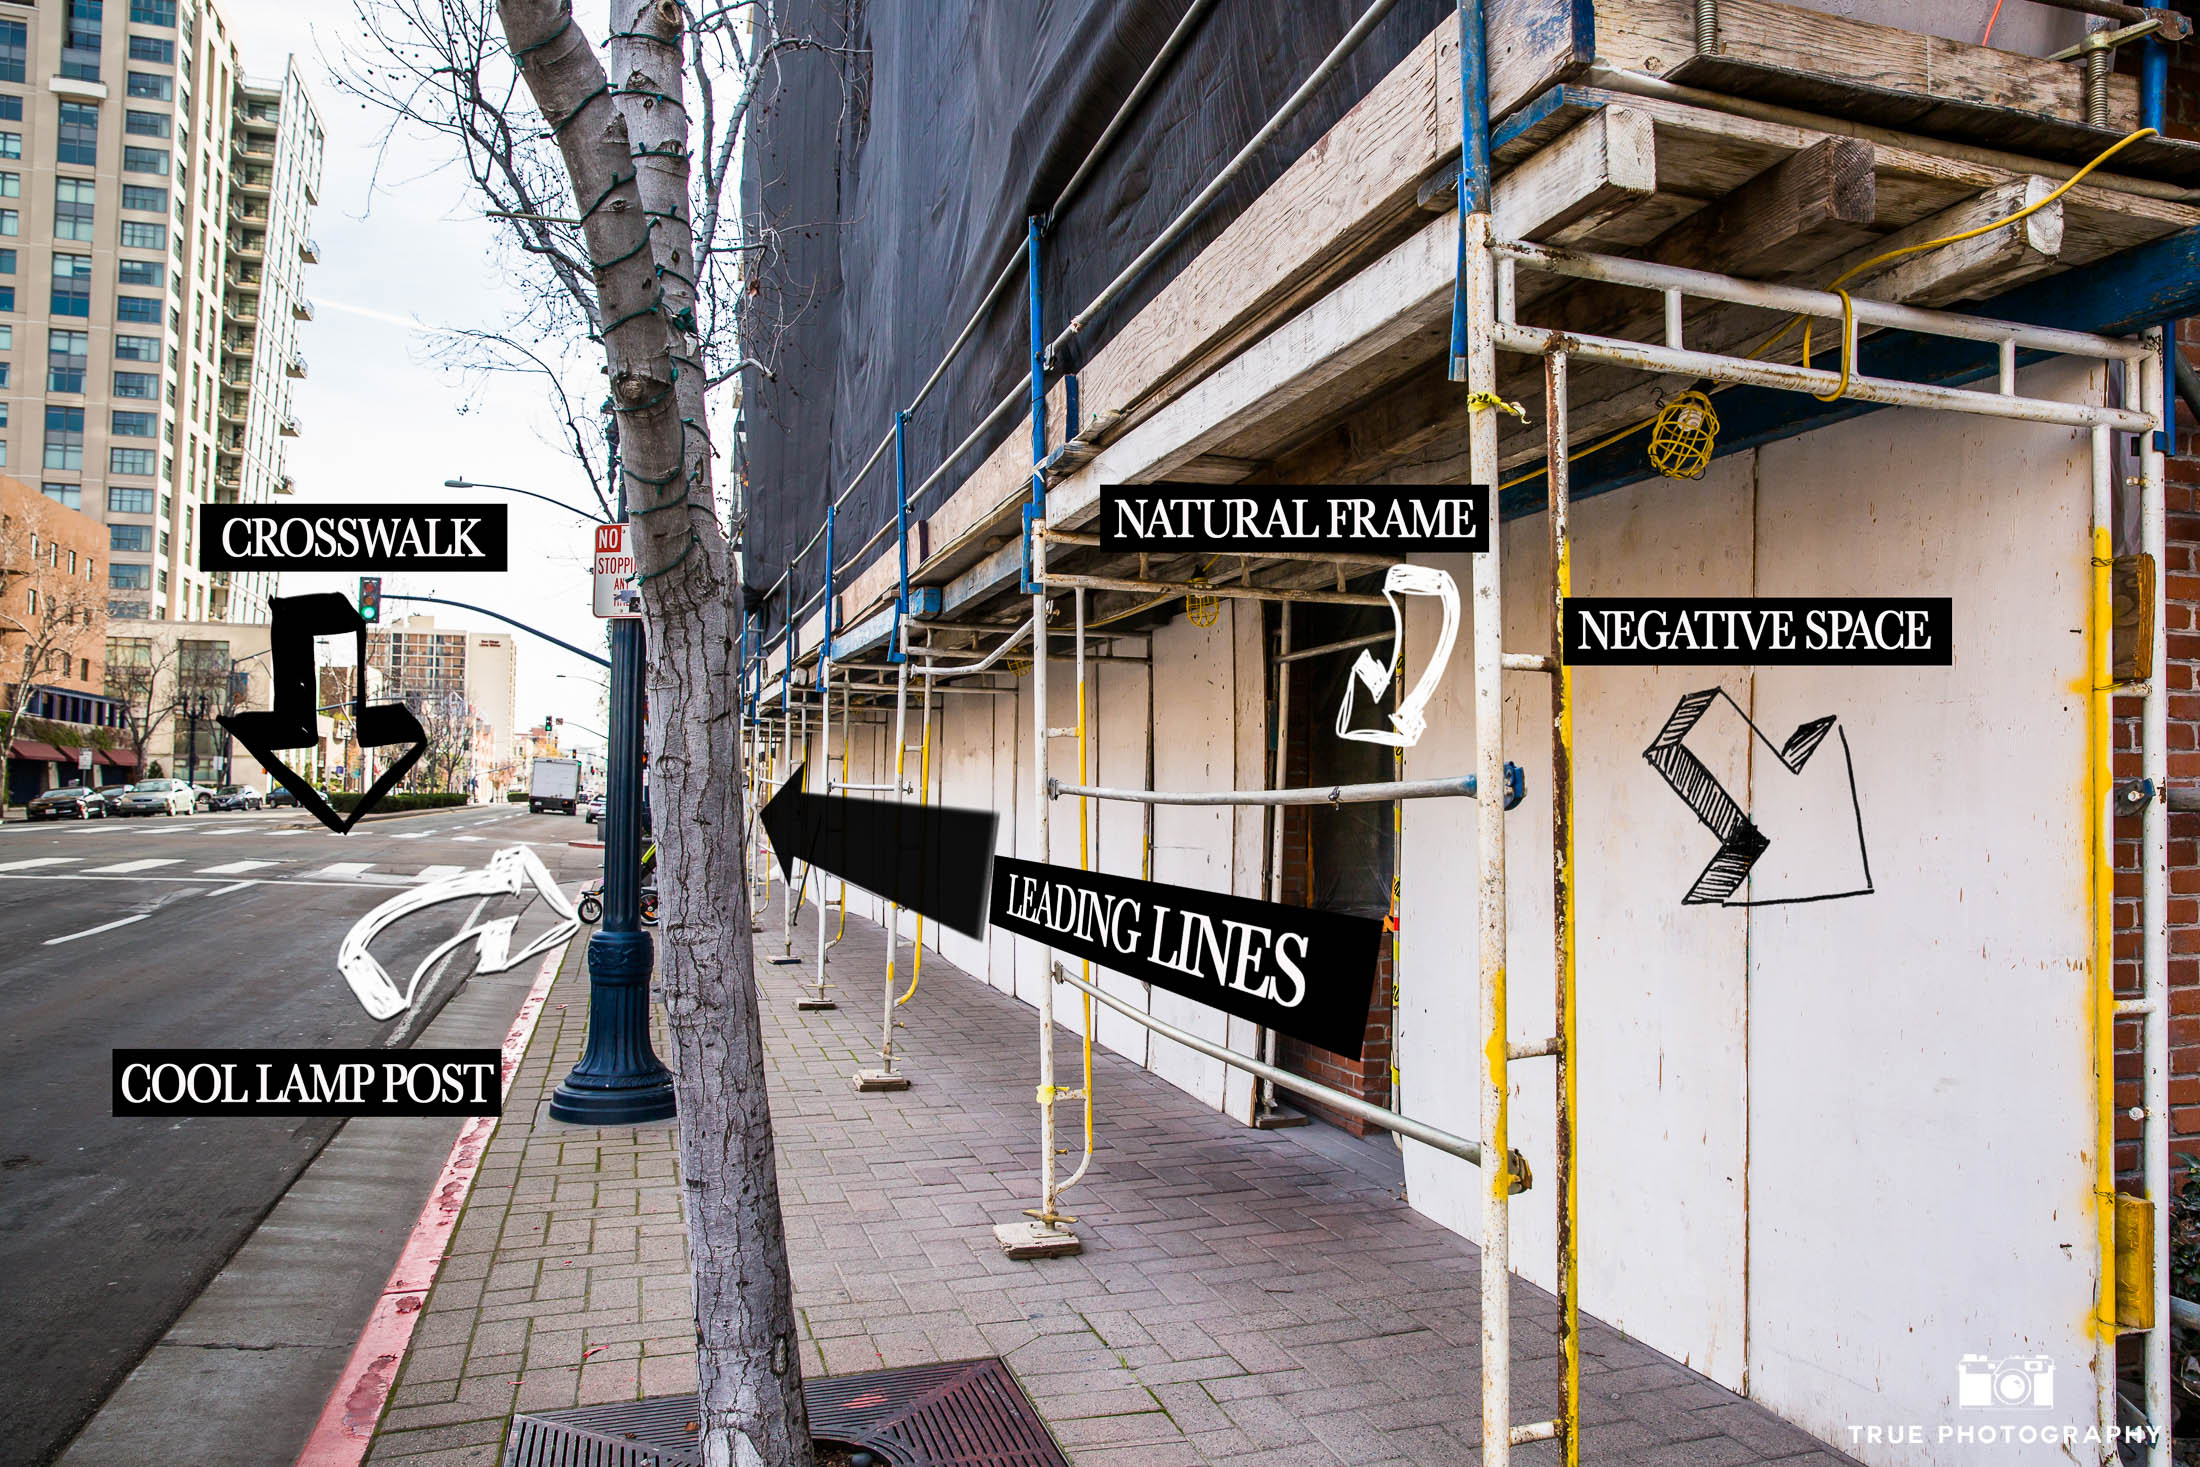
Step 1 – Image Selection
When new photos are ready to be worked on, we start with a Culling Process. This is where we help narrow down the images and remove any duplicates, eyes closed, eye blinks shots.  This involves a reviewing of every photo from your shoot, and deciding which ones best represent your day. You will still have access to every photograph taken, but there are certain shots from your photoshoot that are the clear standouts.

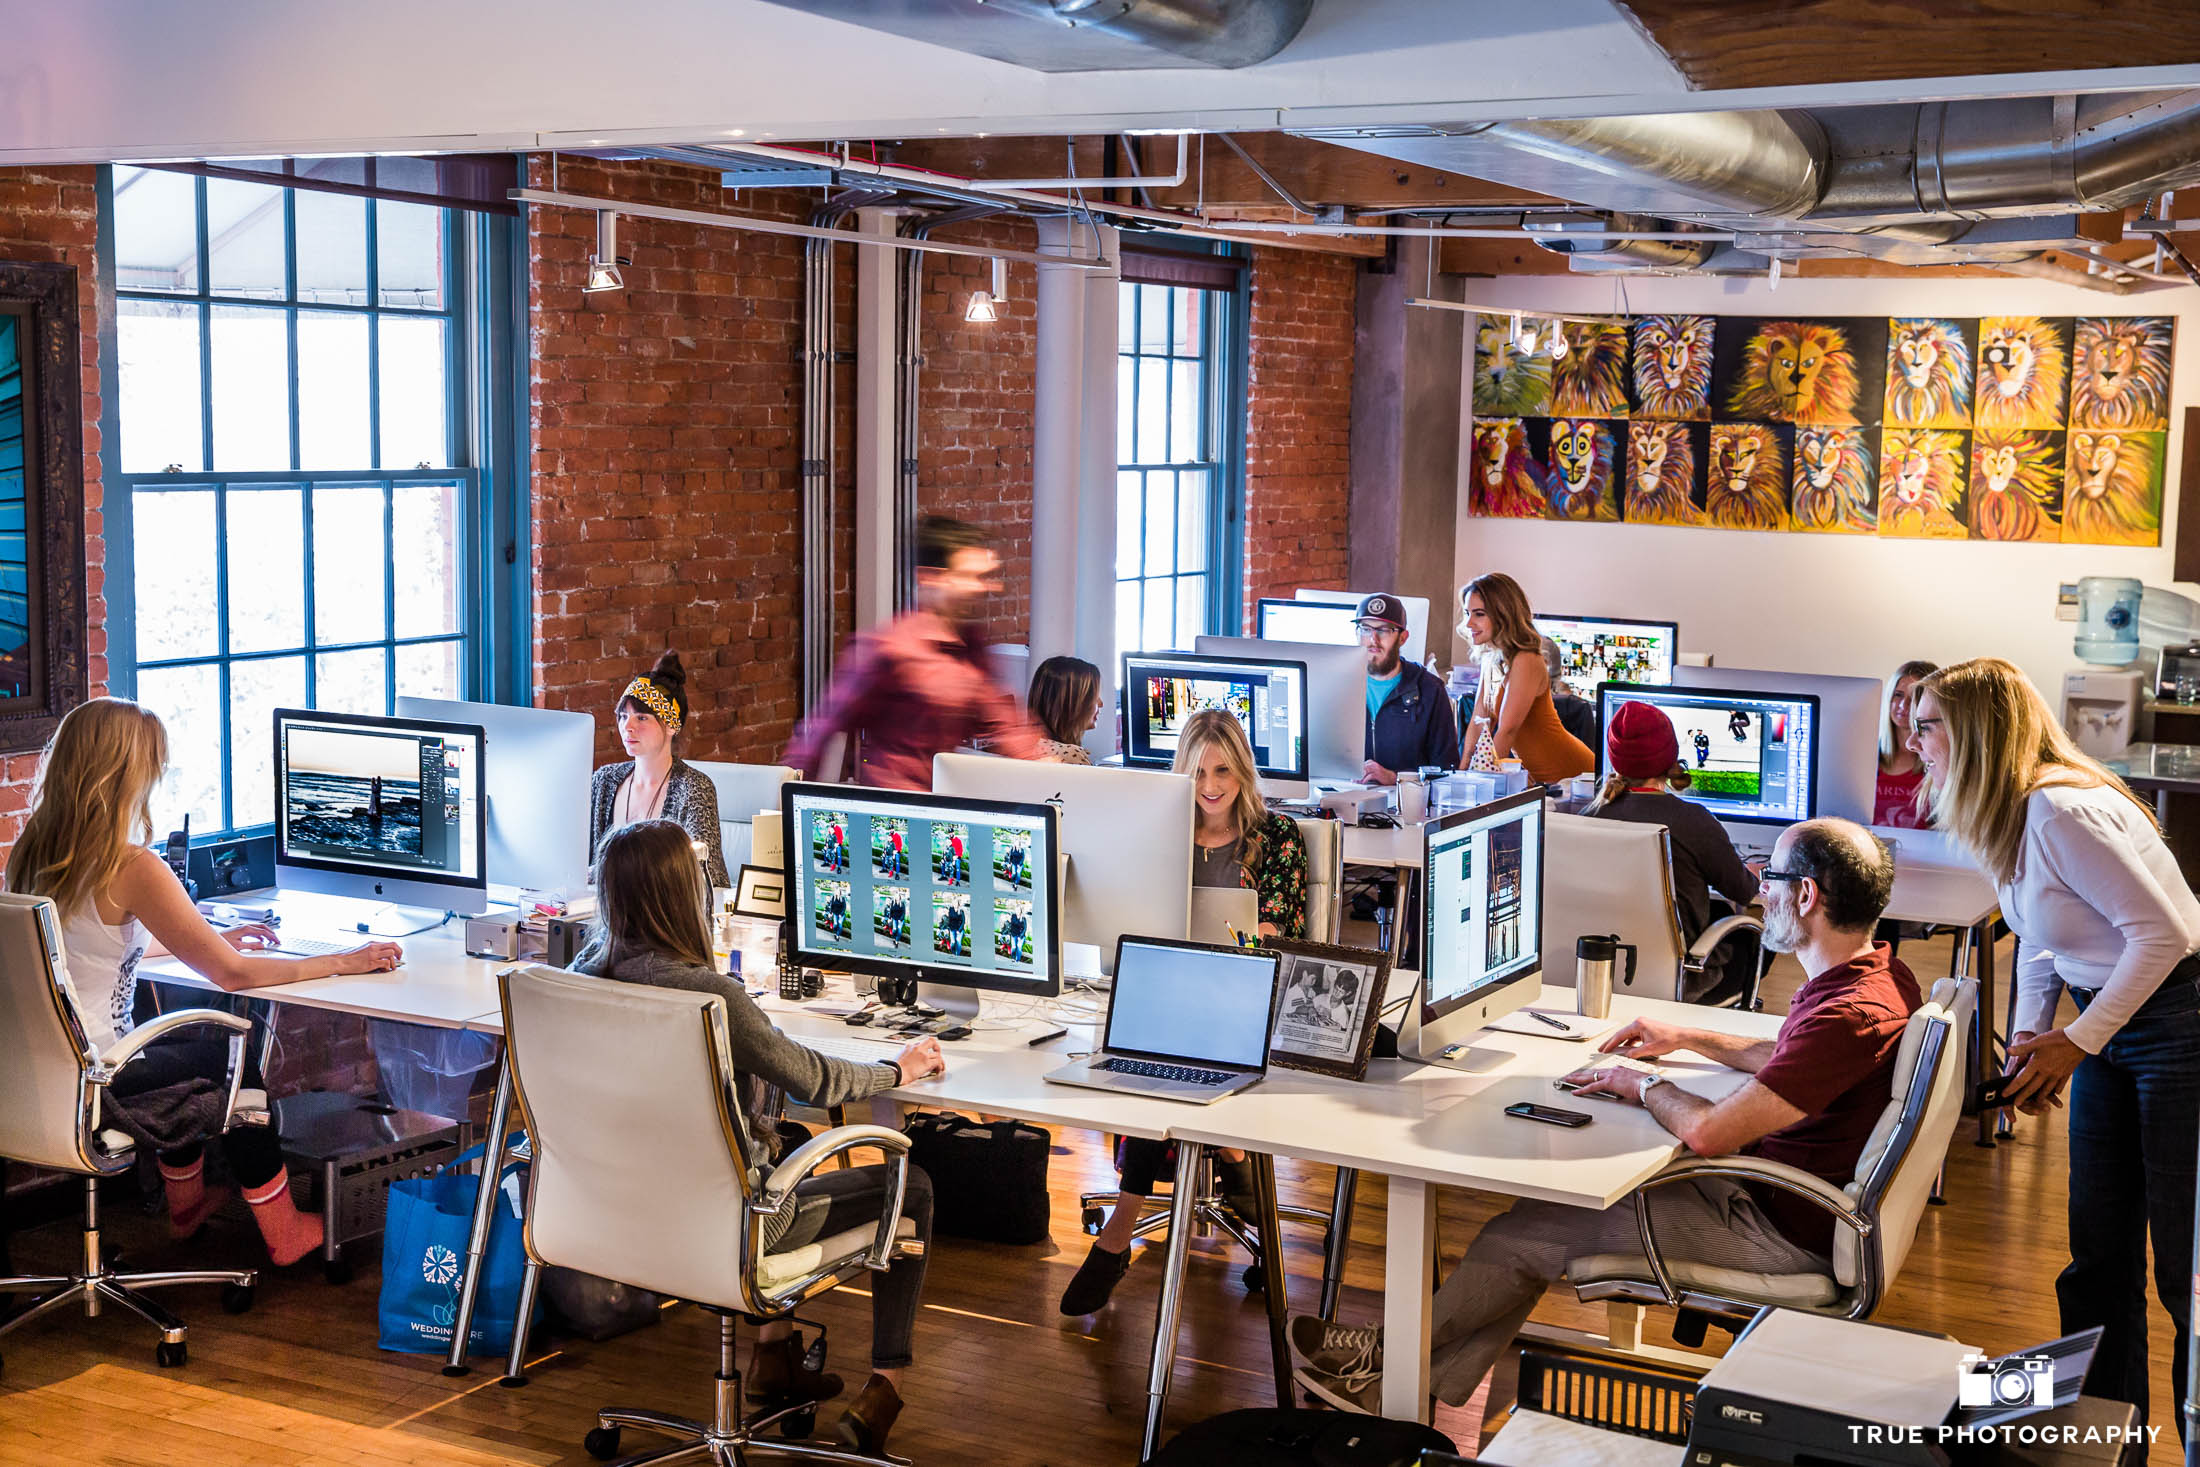
Members of our team, working hard on your photos. When making selections, we make sure to showcase a variety of poses, locations, and lighting. 

STEP 2 – Image Enhancement
Now that we have our  images narrowed down, it’s time to give them the True treatment. In this step, we adjust tones within each photo, correct temperature, and refine the color. We make a lot of small decisions that dictate how far to go, and when to stop.

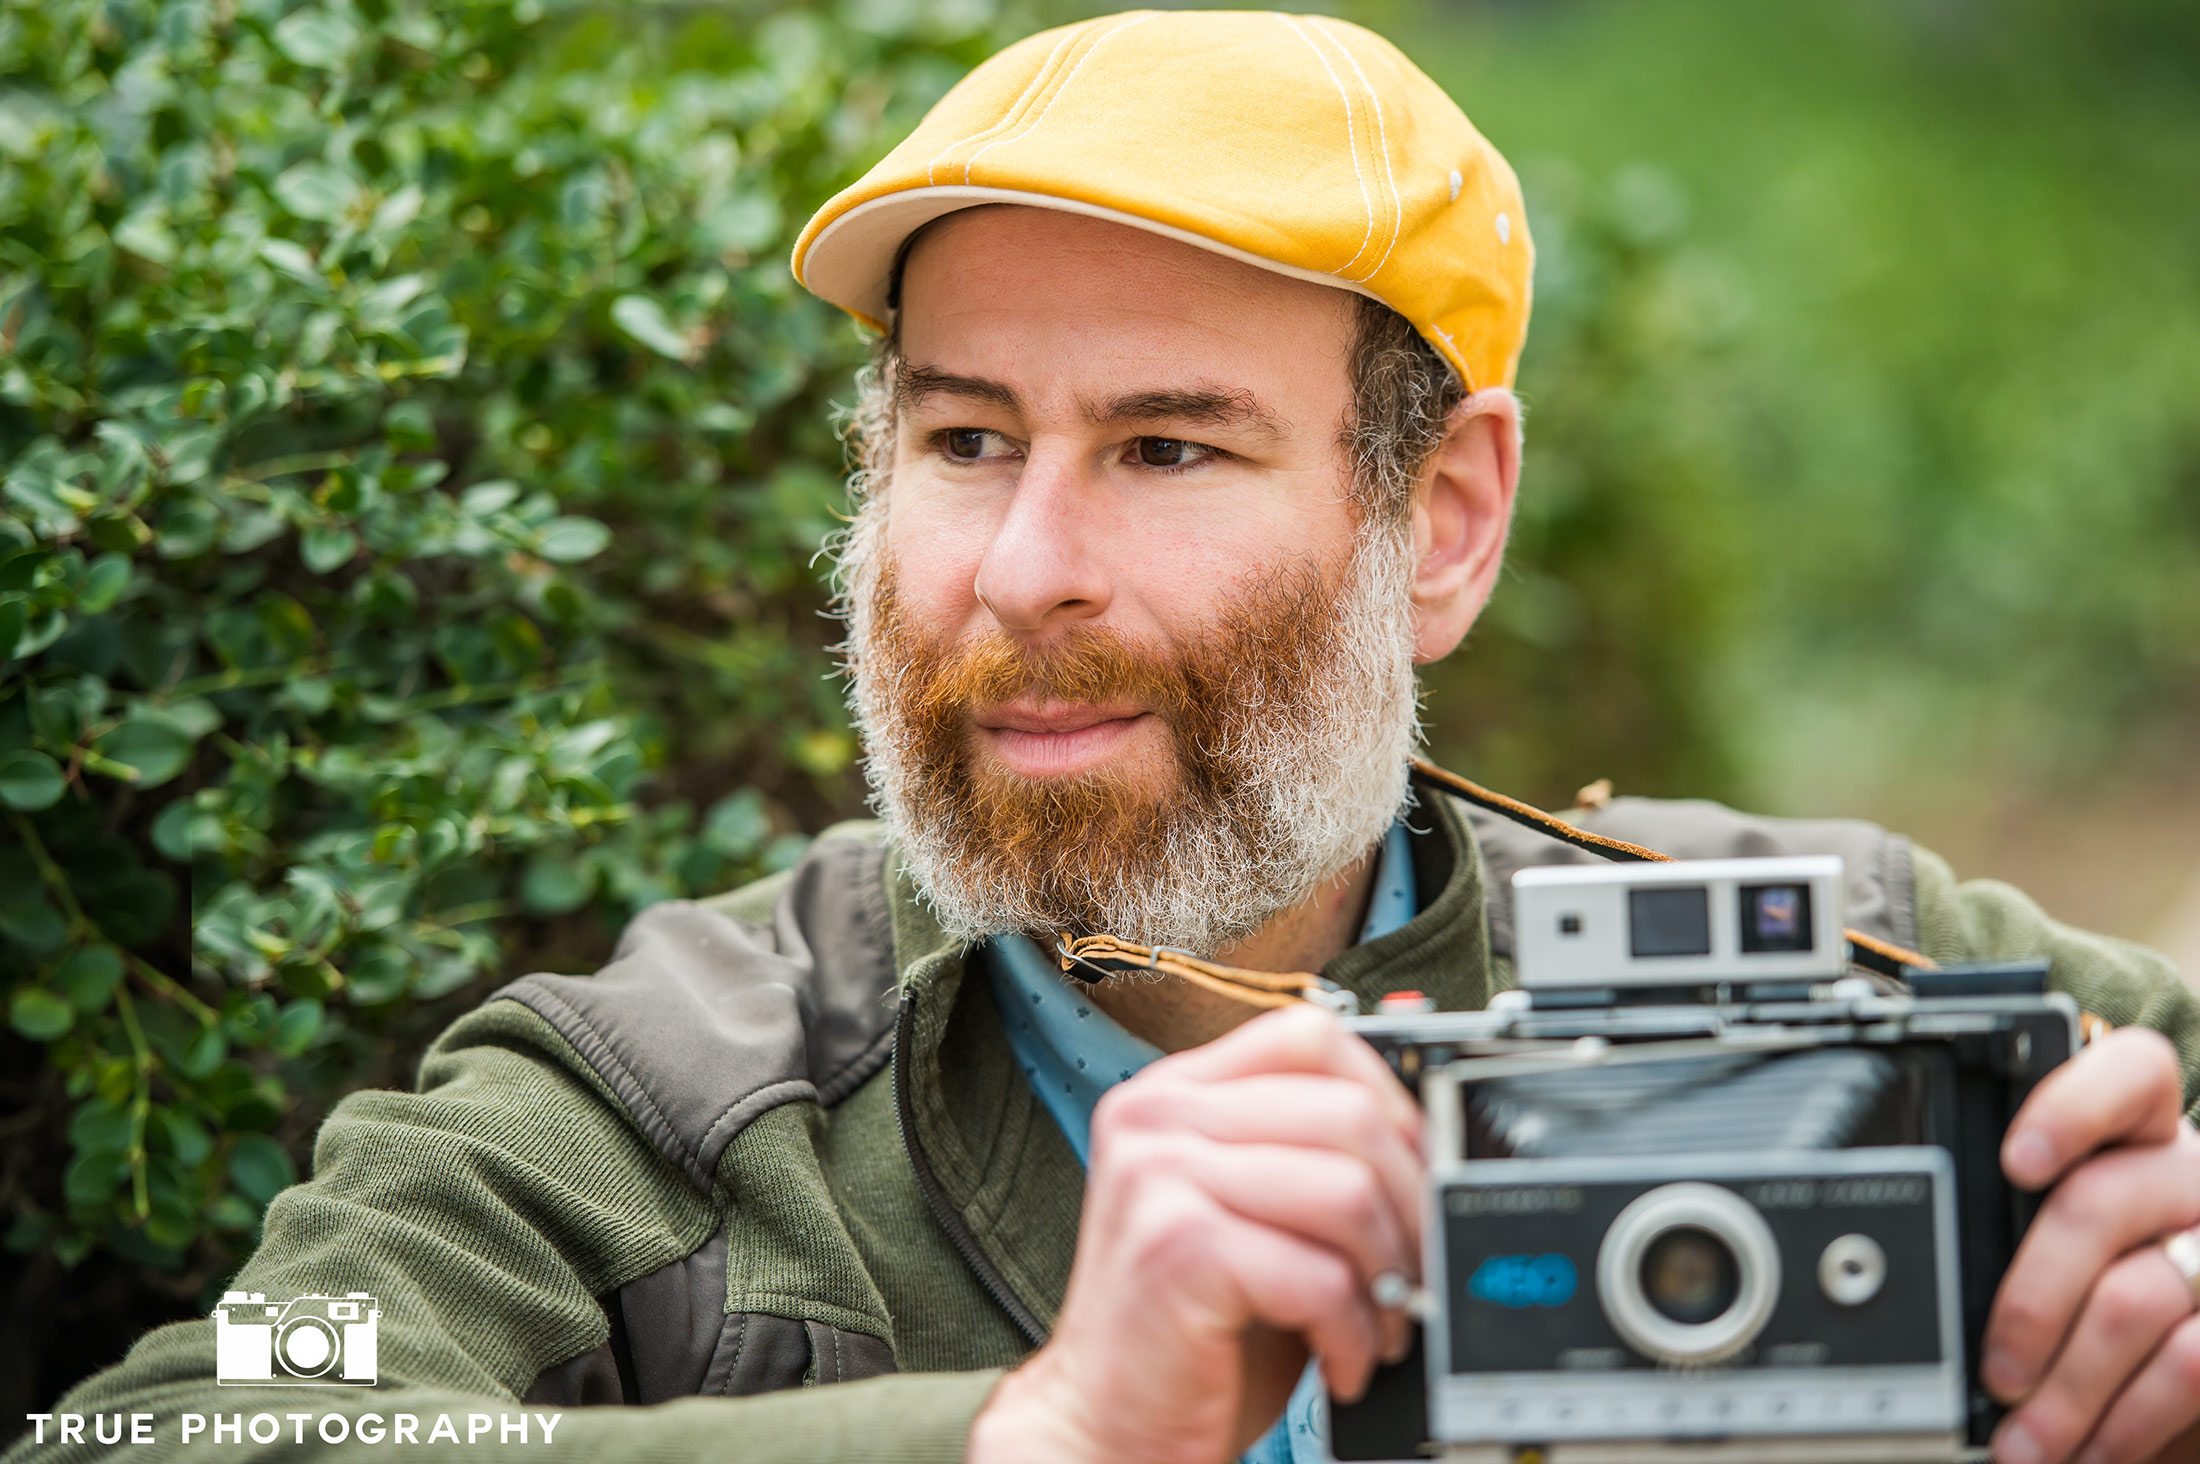
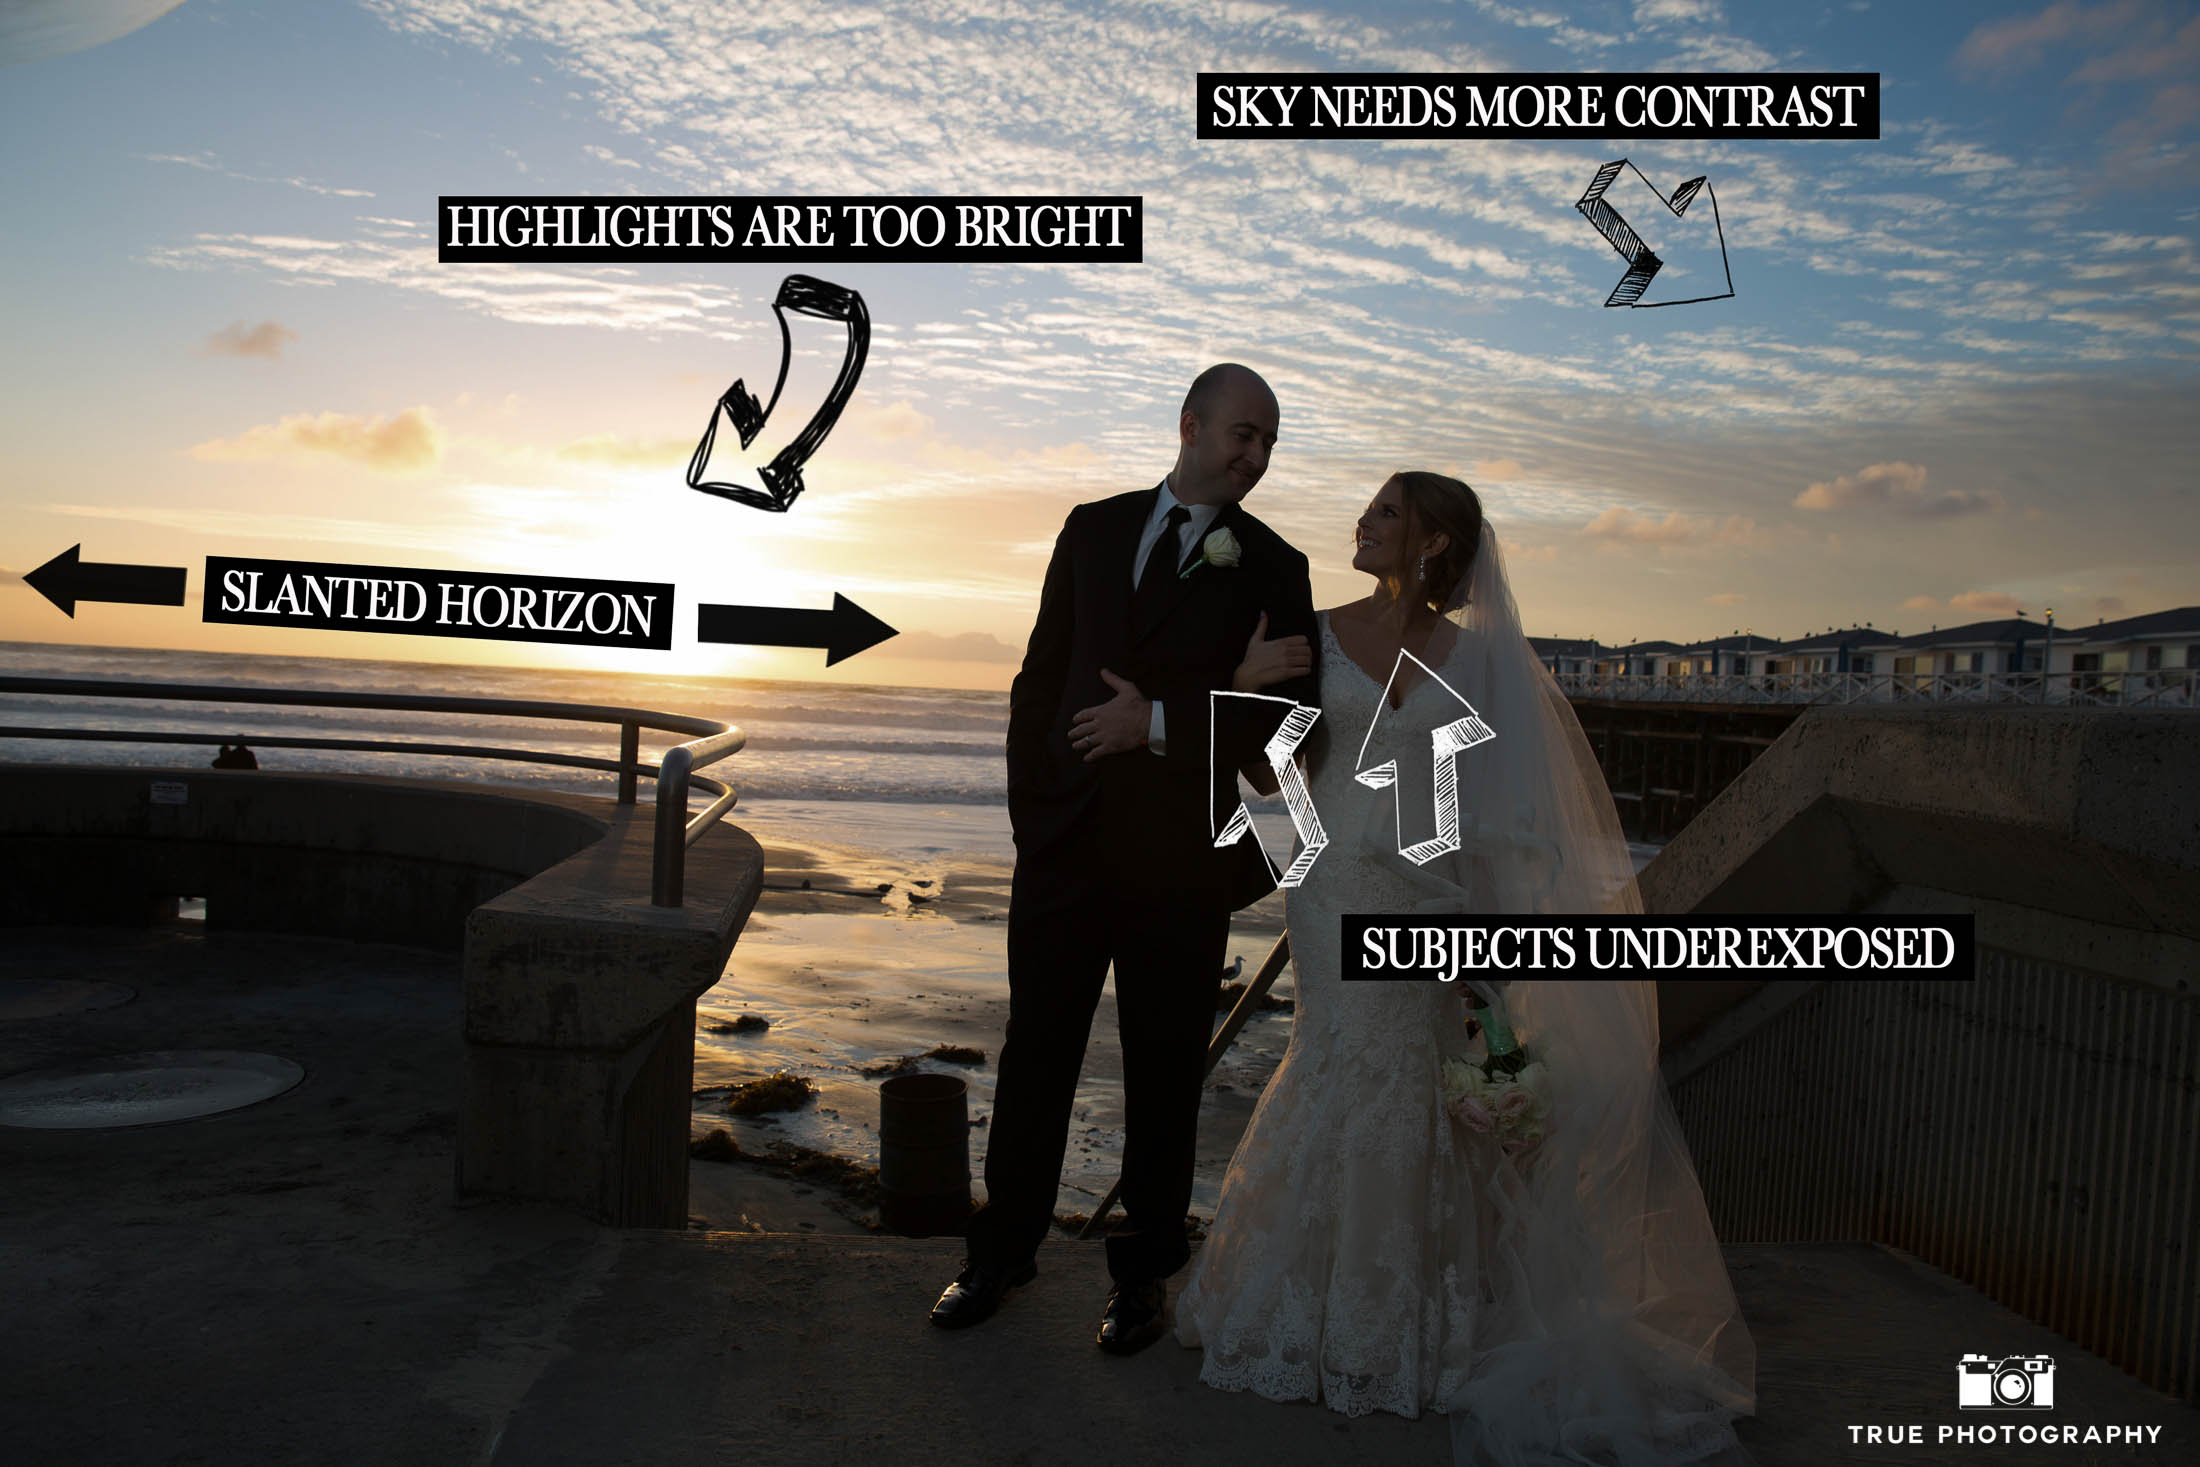
For example, check out this image taken at Meaghan and Daniel’s wedding earlier this year:

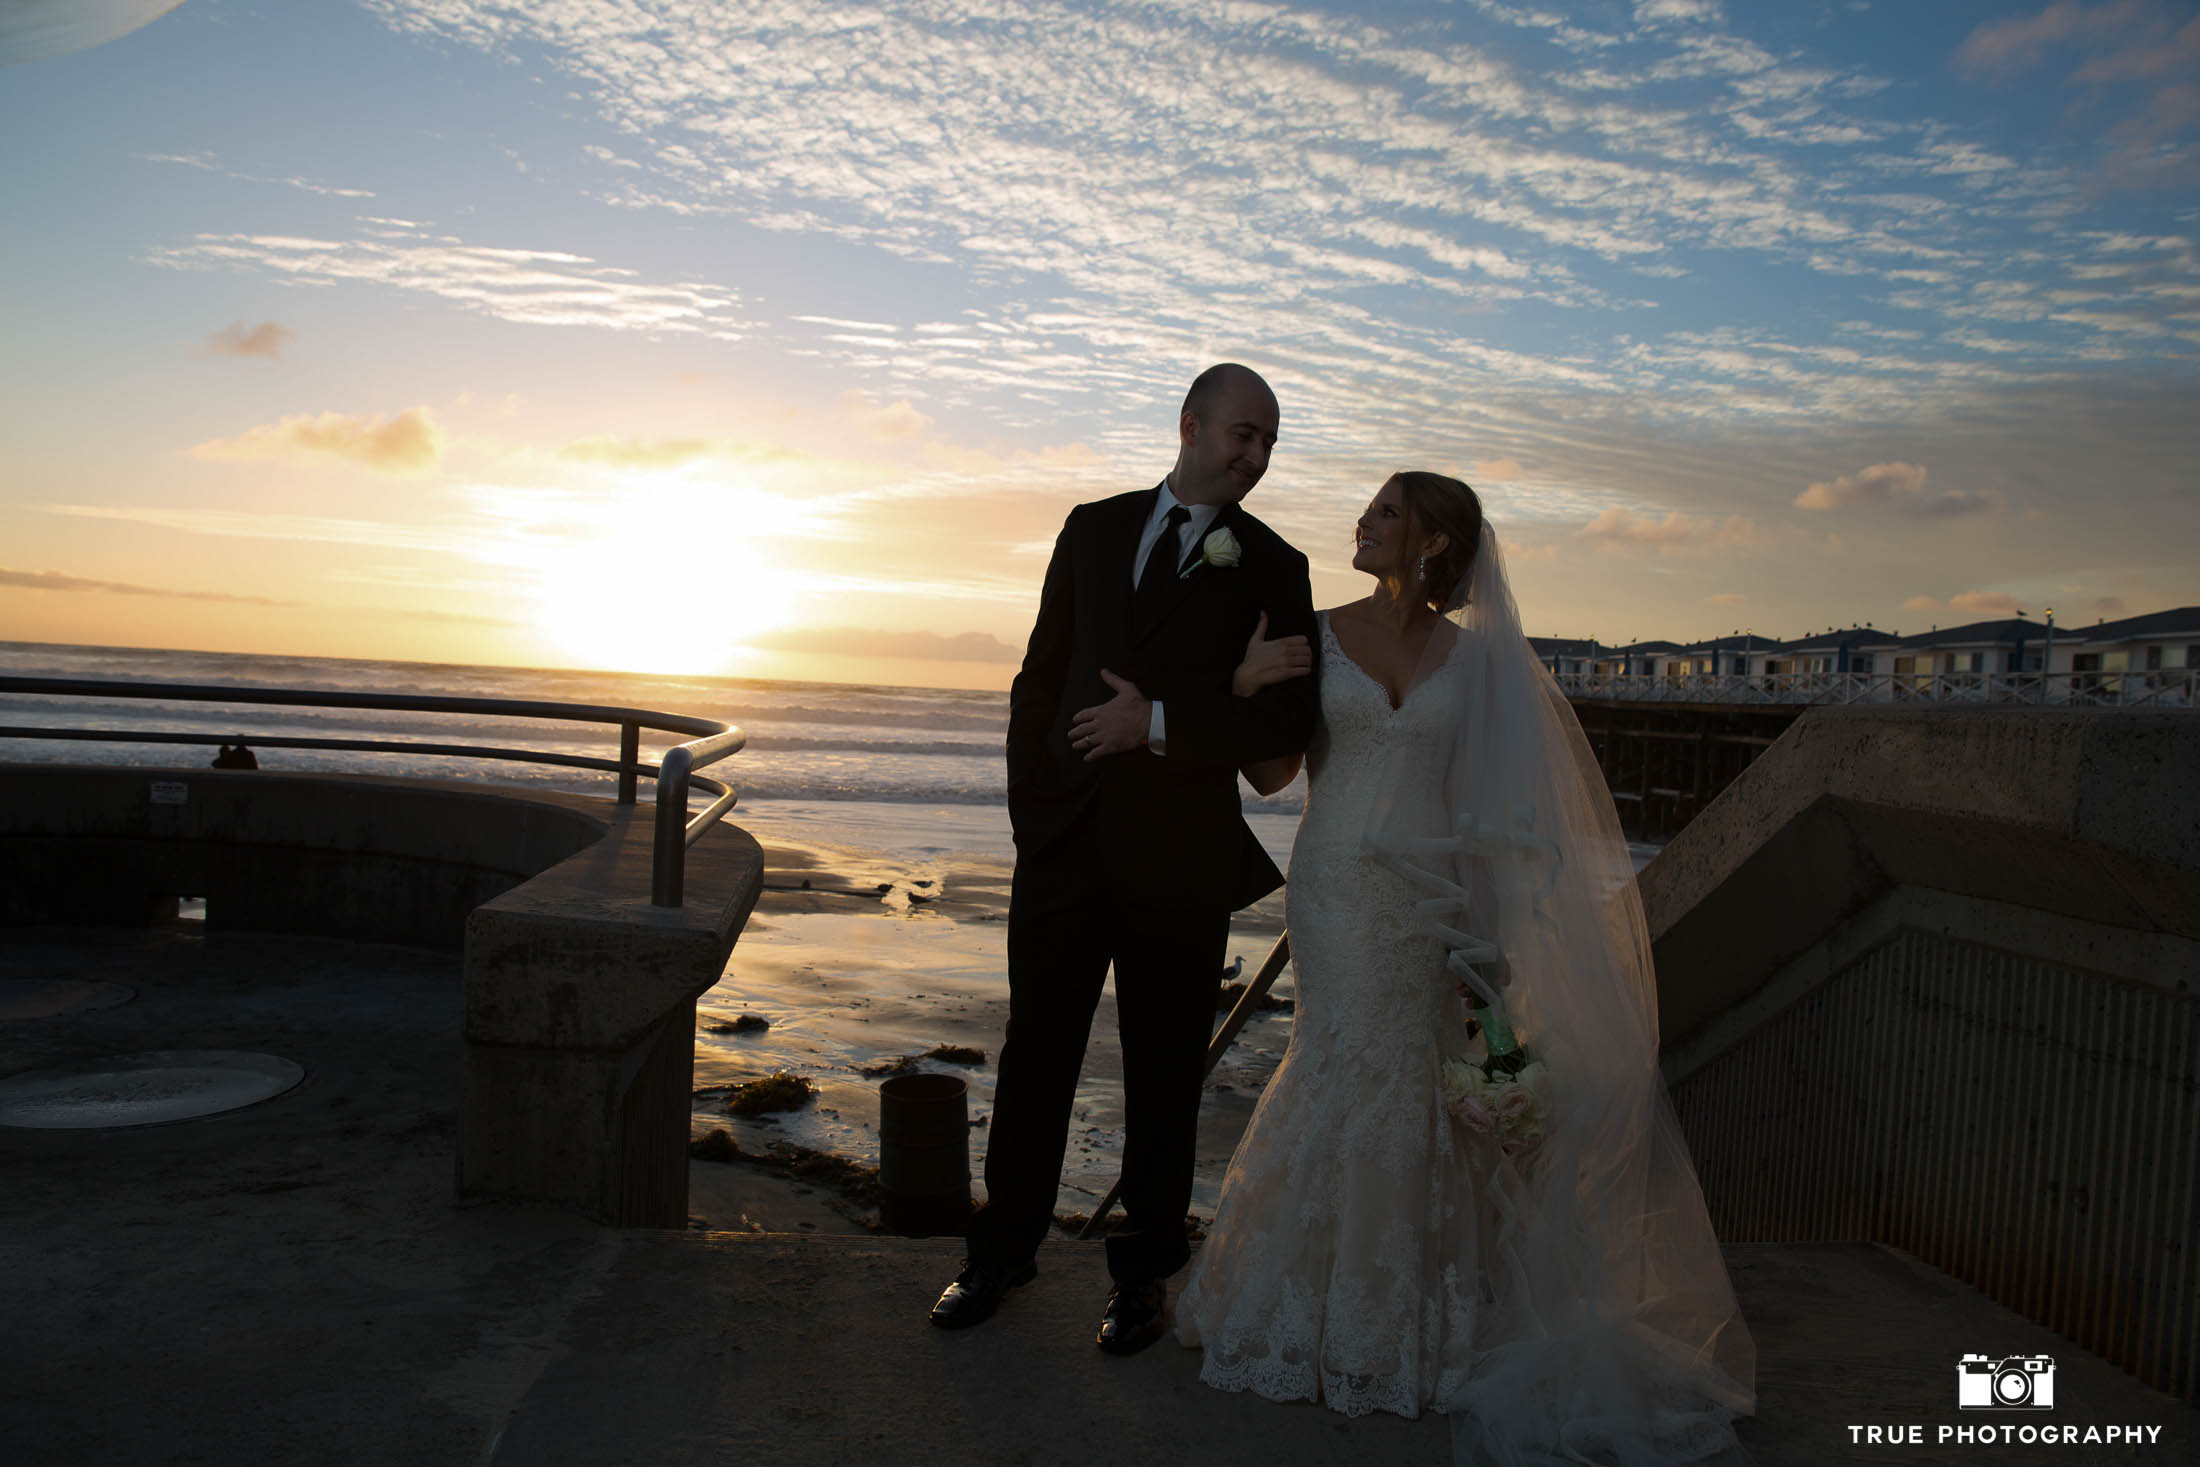
The example above is the original image, right out of the camera. Isn’t it pretty? :) We intentionally exposed it this way, for the highlights, in order to preserve the detail. Had the image been exposed for the mid-tones, all the detail in the sky would be lost, and no amount of post-production would bring it back. 

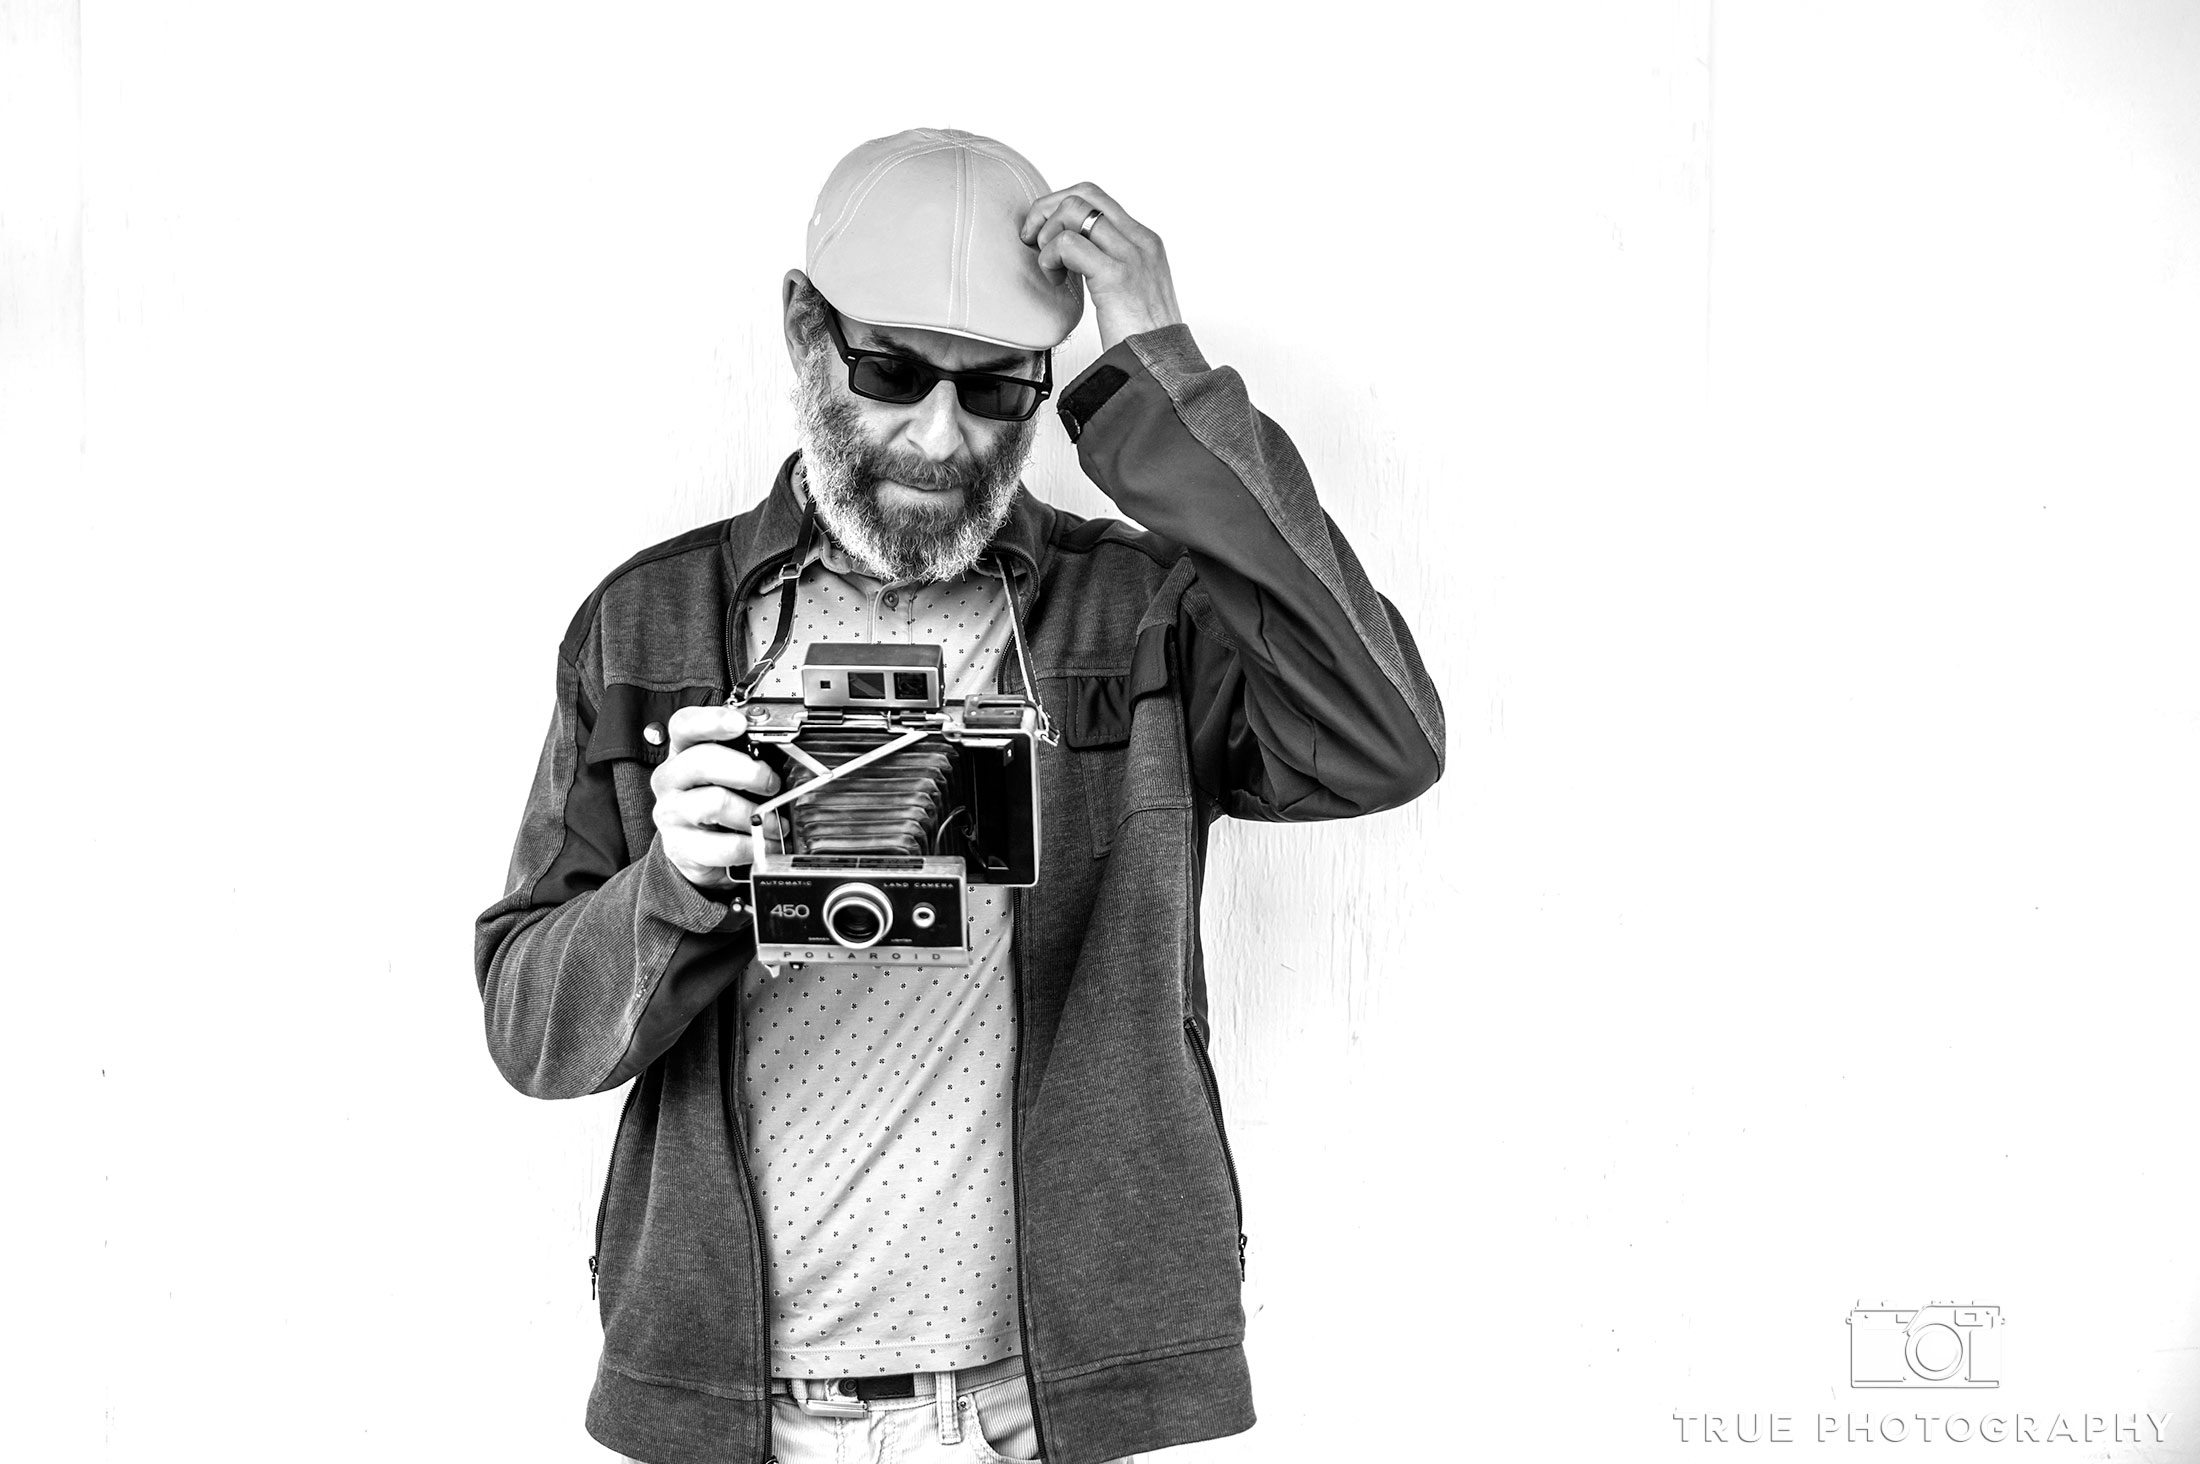
Below are the steps if you have selected our upgrade Event Highlights, Enhancement and Retouch option. We identify the areas of the image that will require additional hands on enhancement.

To address these items, we add our “Secret Sauce.” This consists of applying our custom, painstakingly developed Photoshop presets, as well as expert manual adjustments. We balance the color temperature, bring out the shadows, and restore any lost detail in the highlights, resulting in the image below.

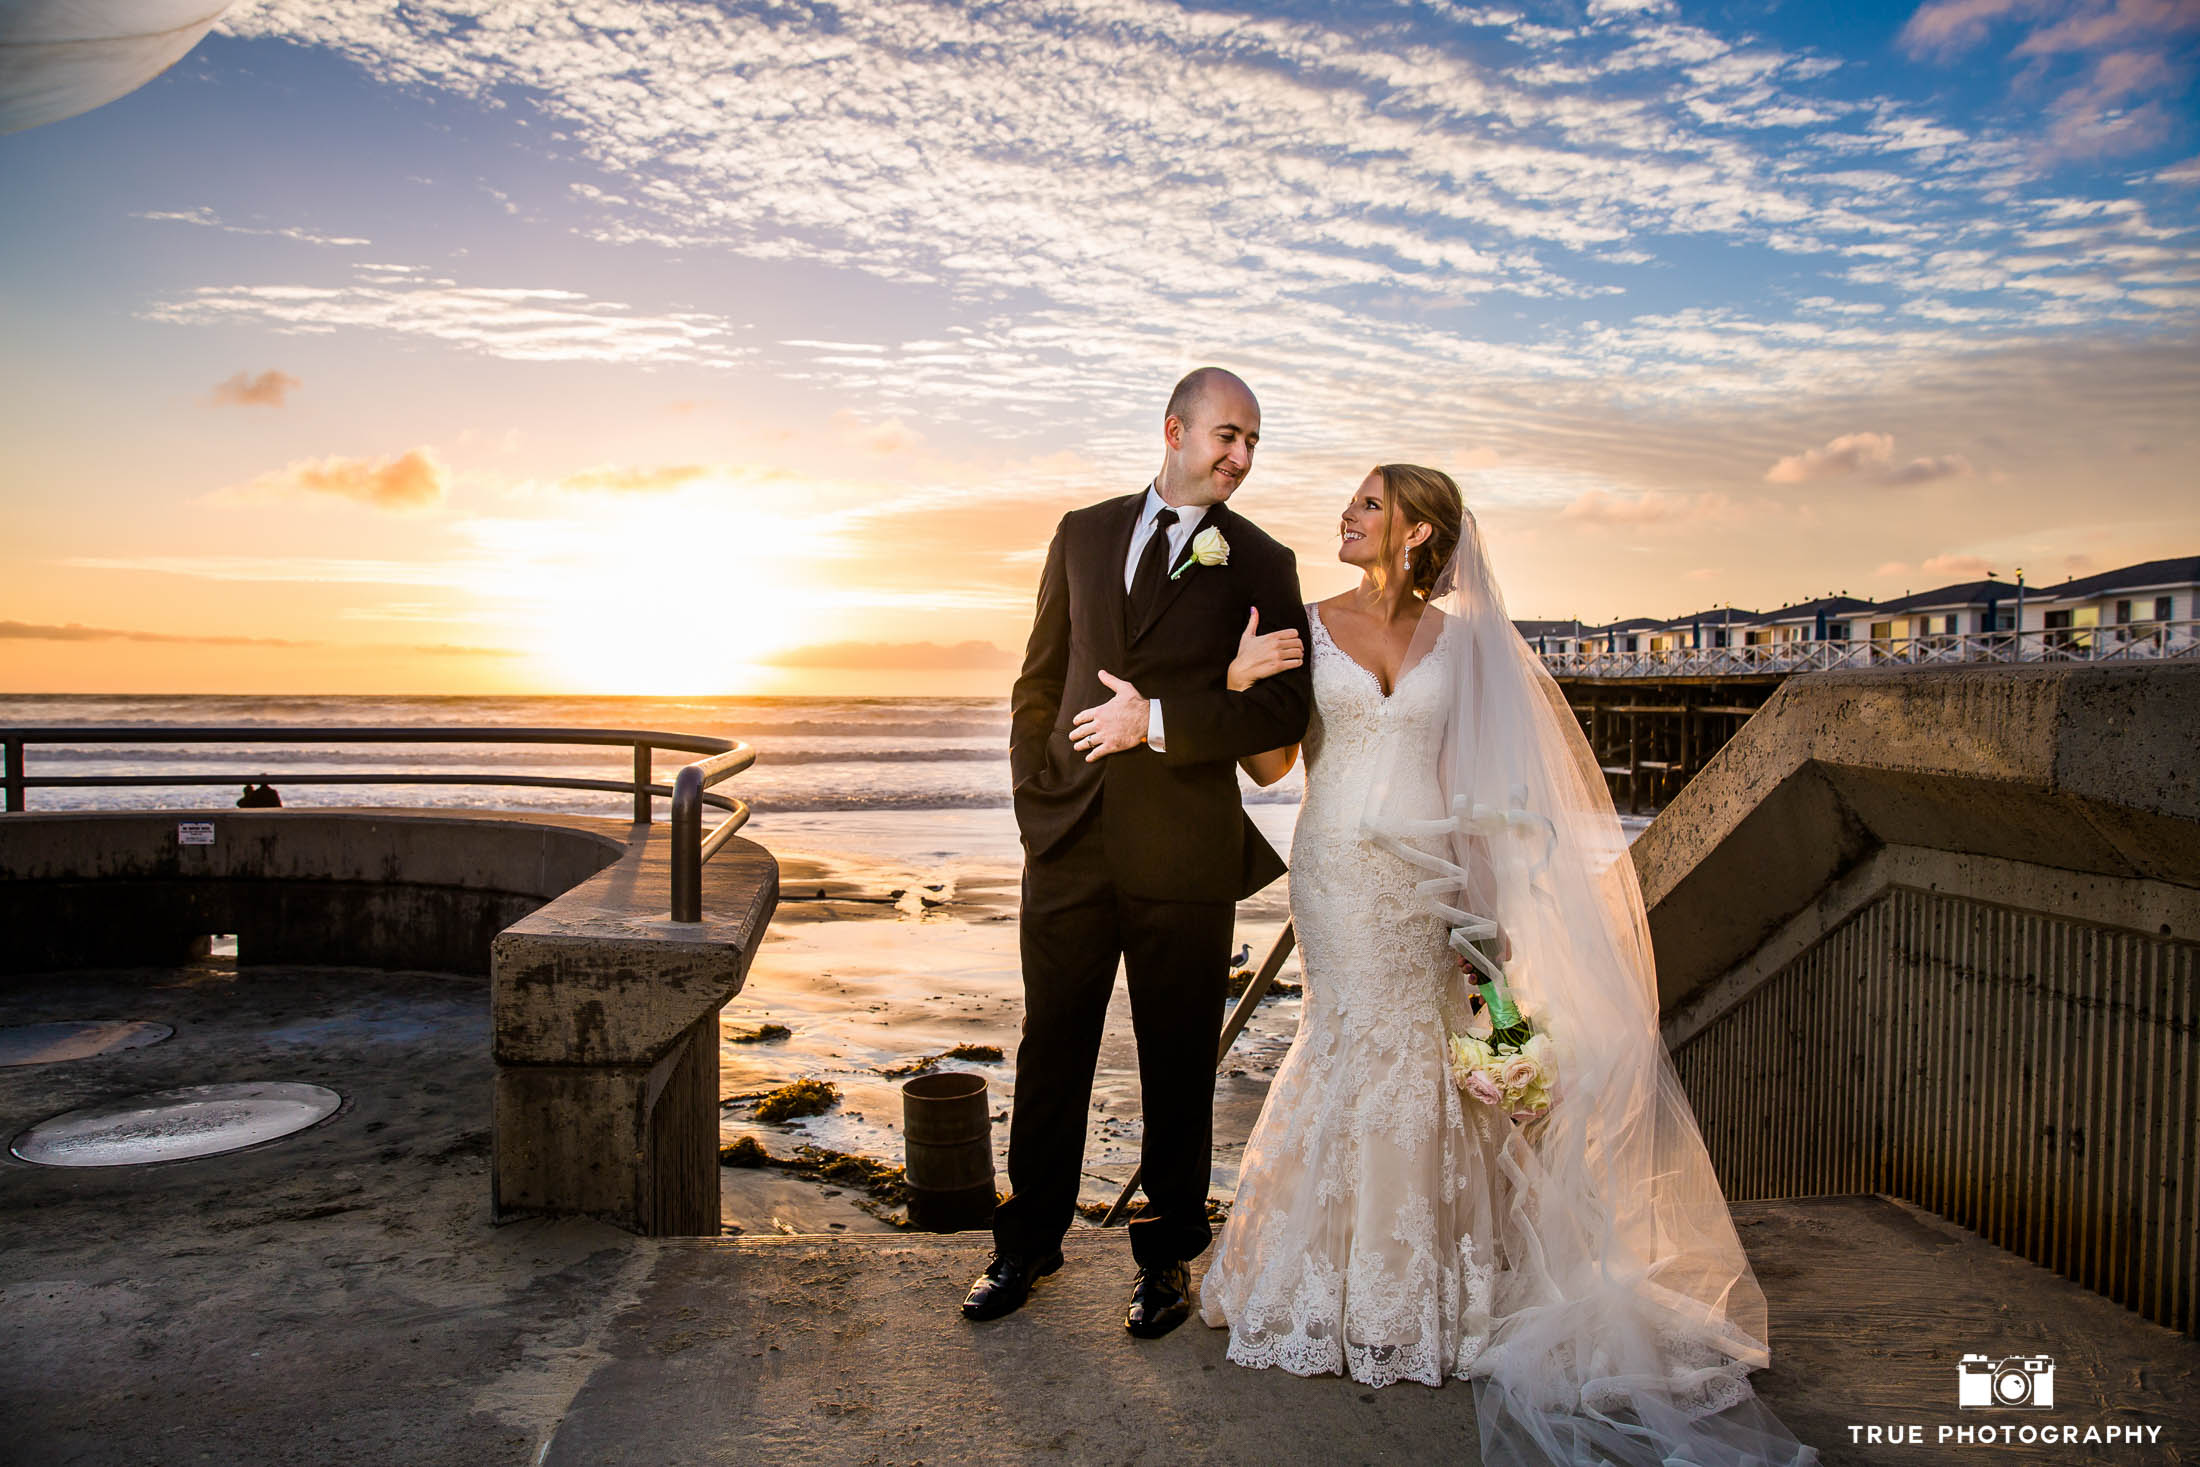
That’s looking better! This is the image after undergoing enhancement. We strive to create images that are bold, crisp and clean, while maintaining natural skin tones.

Step 3 – Image Retouching
With the image looking the way we want it, it’s now time for a little retouching. In this step, we use meticulous Photoshop techniques to remove skin blemishes, fly away hairs, and any other distractions in the image.

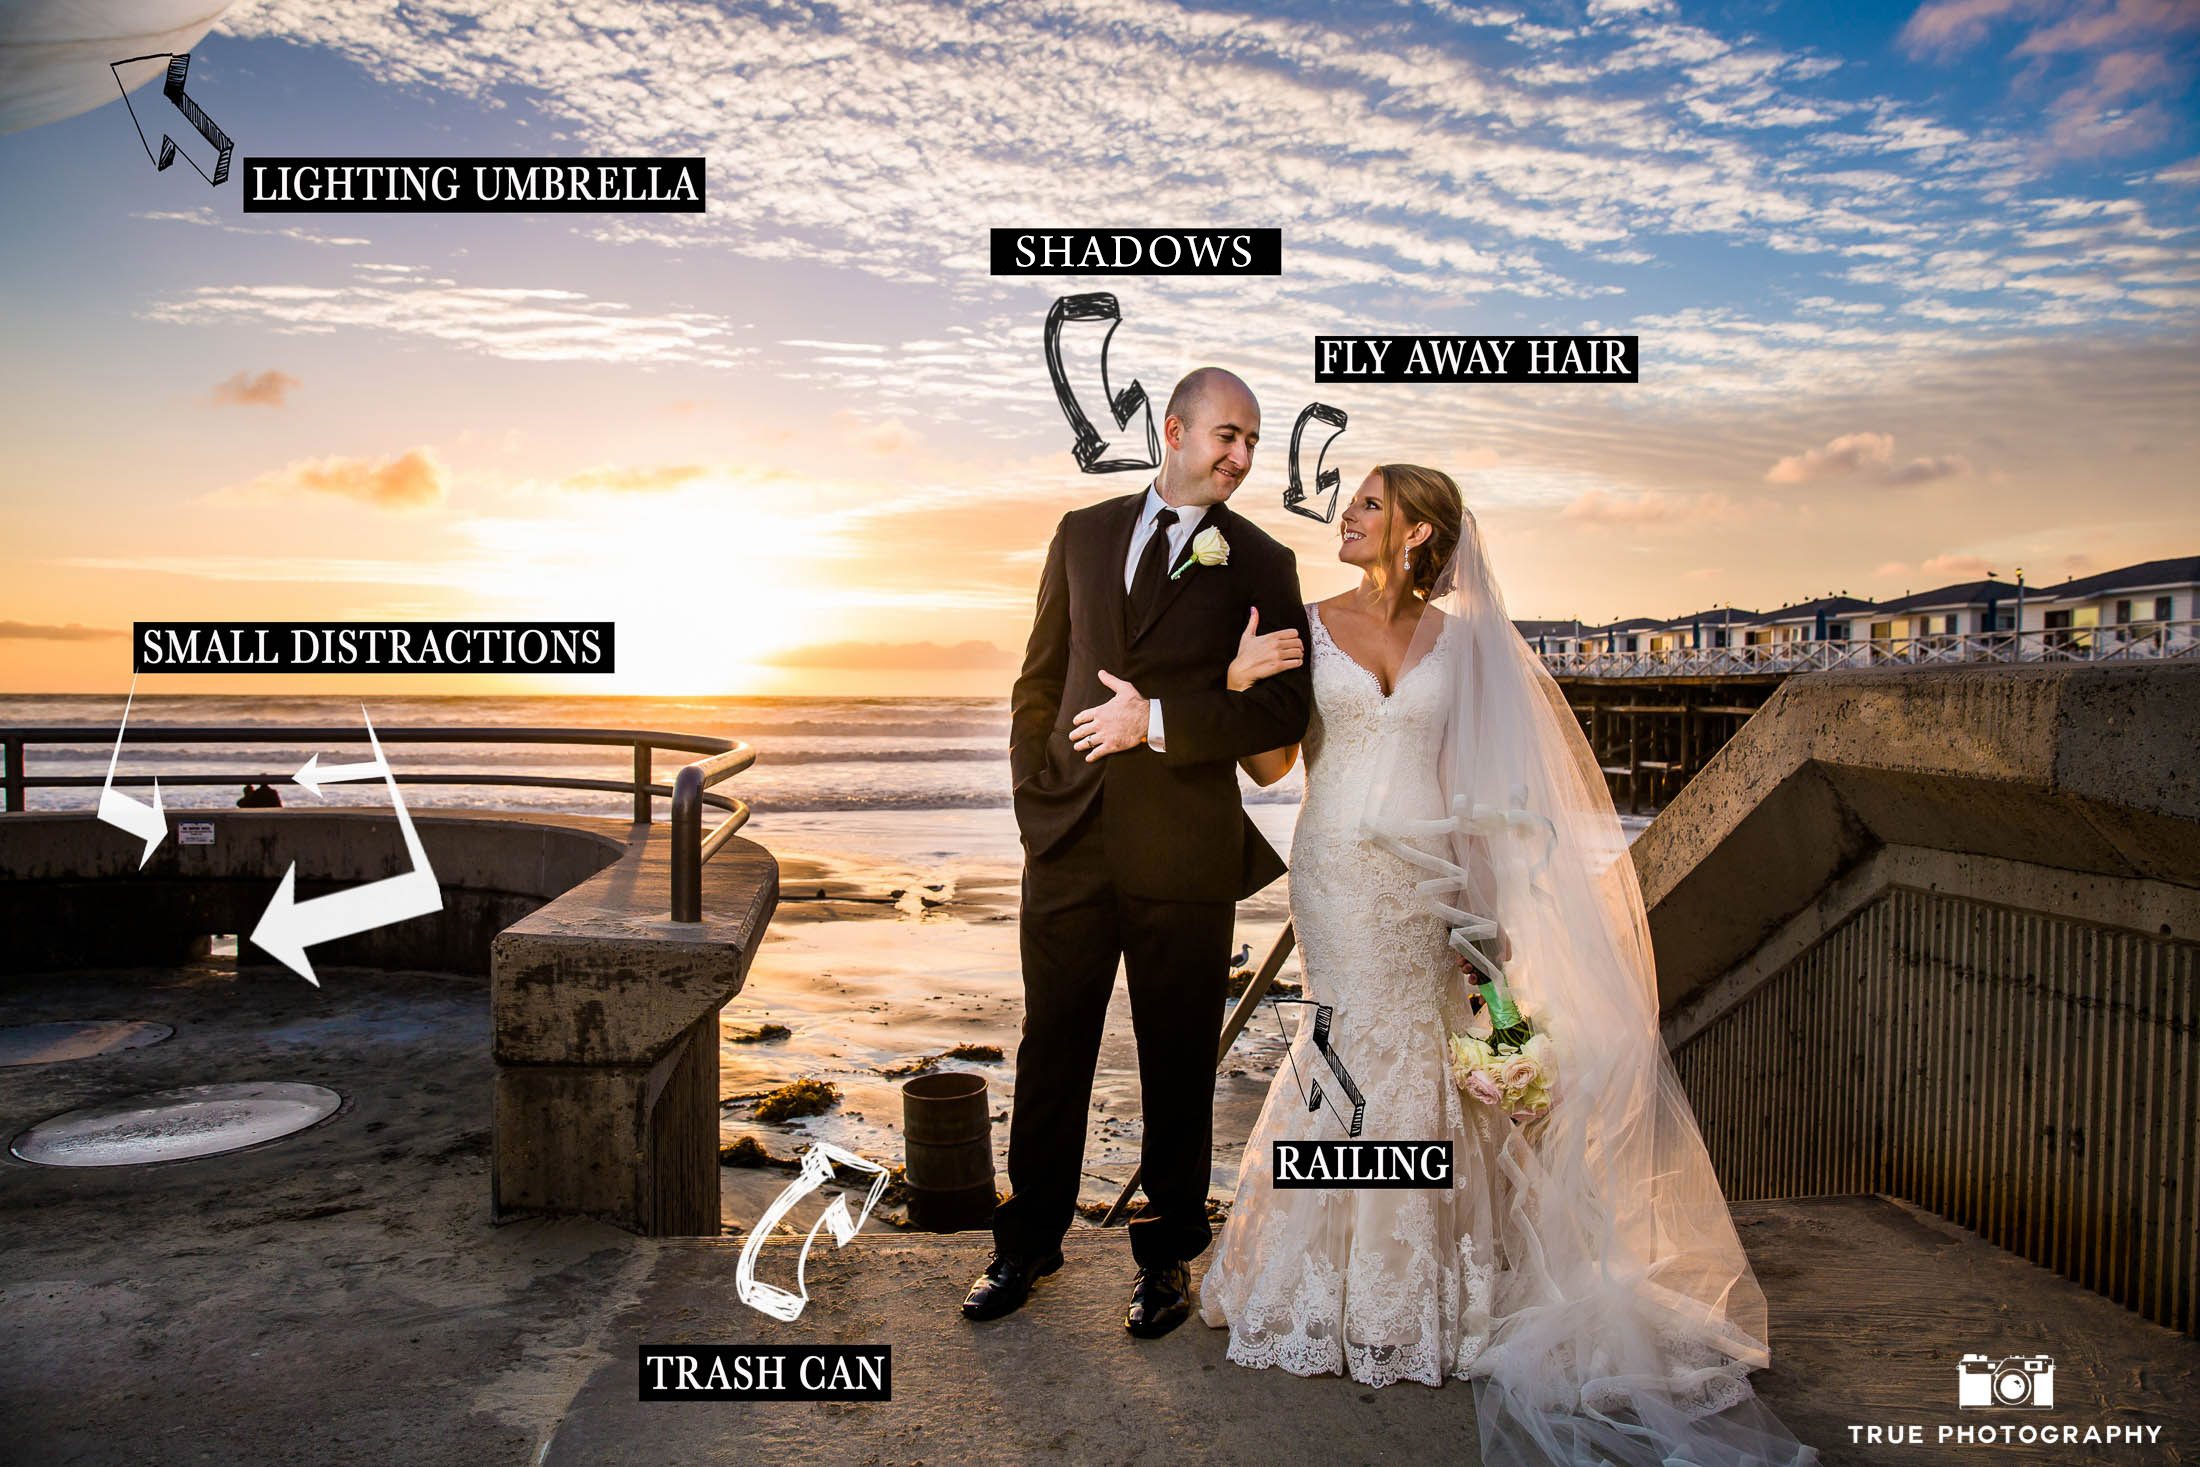
We identify areas of the image that will be retouched.

Step 4 – Image Delivery
After identifying the problem areas, and retouching the image, the result is a final product that we are proud to deliver to our clients. Check out the example below to see the results, after the retouch has been performed.

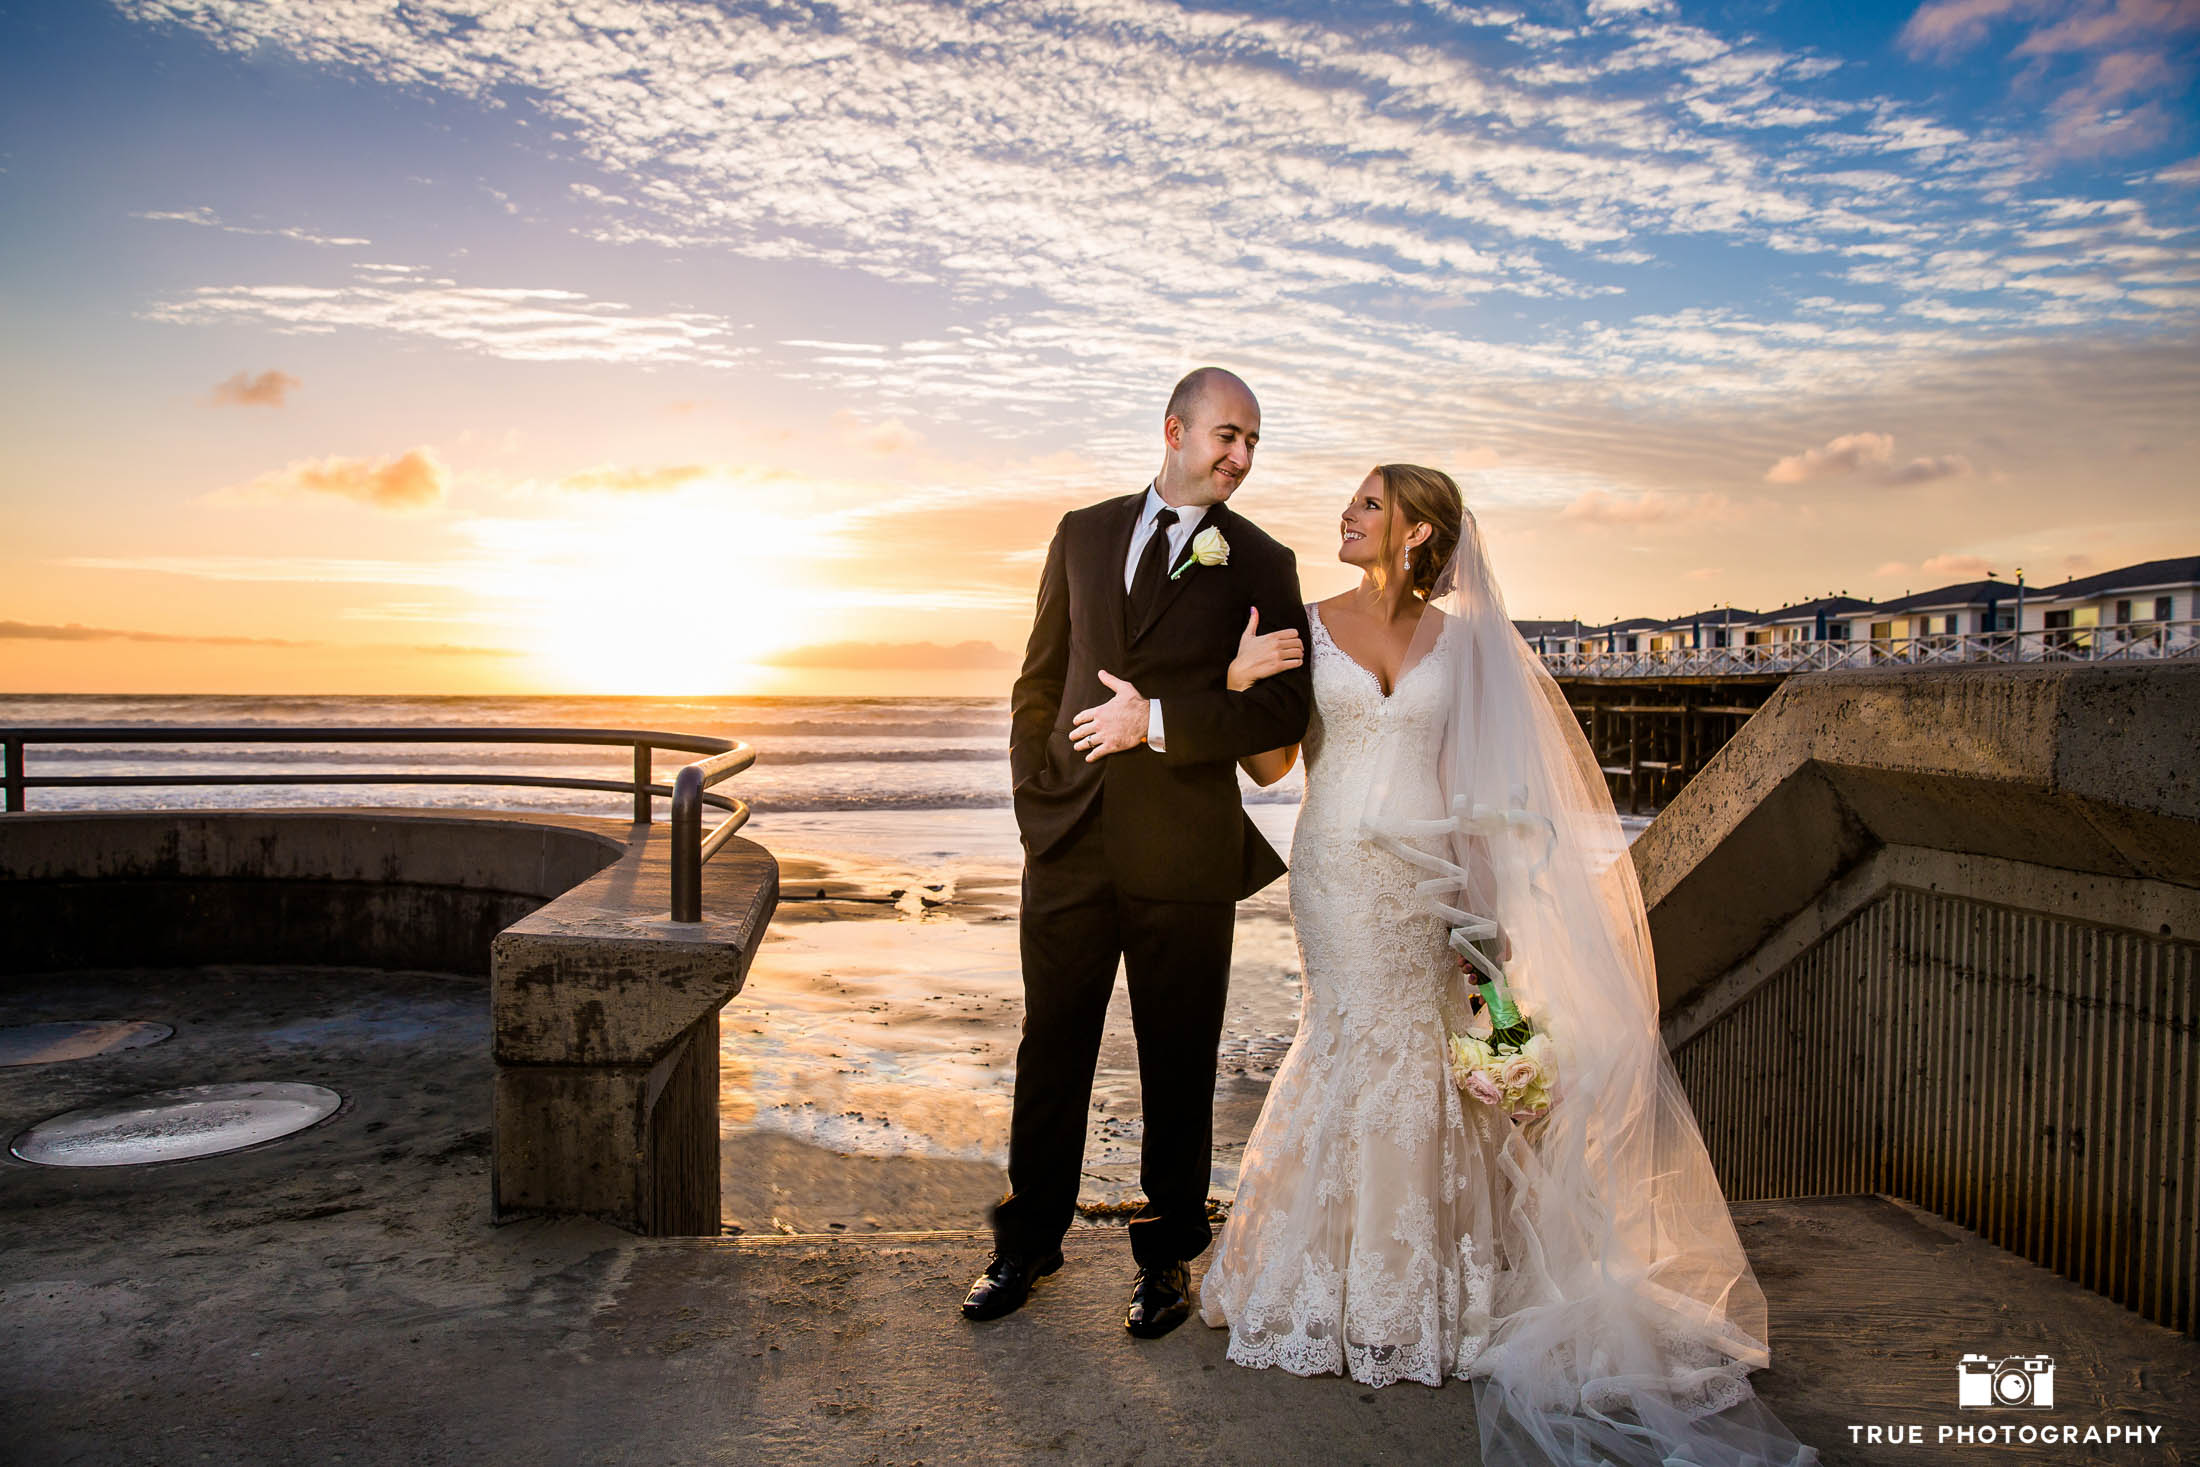
Compare this against the original image from before!

We hope you enjoyed this peek behind the scenes, with a glimpse into the hard work that goes into your finished photos.


01Feb

It’s all about having the “True” Eye

By, February 01, 2021

With over 17 years of photographing professionally, we’ve seen our share of beautiful locations, some of which have been designed to look perfect. But not all locations have what many would consider “a lot to work with.” For example, a photo shoot could take place in a nondescript backyard. Or the light condition may be really harsh. Or perhaps, due to rain, the shoot may be moved indoors at the last minute. No matter the environment, it’s our job to make the photos look their very best!

When we are presented with a challenging location, there are two techniques that we like to follow. One is to use the location as it is. We incorporate the existing conditions into the photo shoot, and show the background as it is. Ex: if we are in a supermarket parking lot, this will be apparent in the finished images. We take what we have to work with, and find ways of making it interesting and creative. 

The other technique we use is to re-purpose the environment. We basically work around the constraints of the location, looking for dramatic lines, angles, unique lighting and focal blurs. The result is nice stylized shots, even if you can’t tell exactly where they were photographed.

To demonstrate these techniques, and take you through our creative process, we selected a location in downtown San Diego. This spot is just down the street from our studio. 

This is a building just outside of our studio that is currently under construction.

When looking critically, from our perspective, here is how we see the location:

When we scout out a location, we are looking at it from a very different frame of mind than the everyday eye. We look for opportunities that may typically go unseen. We start to look for potential opportunities that may photograph well.

After stepping into the shot, we can better identify potential spots for our subject.

Having scouted the location, and determined our plan, here are a few examples of the results.

Example 1: Traffic median and building under construction

Here is a traffic median (left) and a building under construction (right).

Here is what the “True” eye sees :) The picture on the left was just the floor in the center median, which made for a nice graphical background. On the right, we used a long lens to shoot through the environment. This added visual interest, and tied in the colors.

Example 2: Normal street view

Here is what a normal street view looks like in this spot.

Above is what the “True” eye sees :) By using a long lens, and looking for interesting lines, we were able to take a standard city view (street crosswalk and rows of lined trees) to create two dynamic images.

Example 3: A small spot of greenery

Here is… not all that much to see. These are the bushes that you often find in a center median. Not the prettiest, but the only greenery nearby.

Here  is what the “True” eye sees :) We wanted to show color within the photograph, and this location was very narrow. To make the image look more lush, we photographed at a sharp angle.

Example 4: A crosswalk under construction

Here is a crosswalk under construction… We were drawn to the potential of the white, wooden construction boards.

Here is what the “True” eye sees :) We re-purposed the environment in the absolute simplest fashion, using the construction boards. This kept the backdrop high-contrast and clean.

Rather than trying to hide the environment, we made use of it, and looked for cool symmetry and lines.

For more creative uses of the city streets in our photography, check out our full gallery of urban downtown photos

See also: San Diego Affordable Photographers

14Aug

Stress-Free Family Wedding Portraits

By, August 14, 2020

During your wedding planning, you may likely wonder how to successfully prepare for family photos. With the right formula, family photos can be a smooth process, no matter how big your family is!

Here are the steps we take on our end to ensure your family portraits are a success:

  1. Your photographer sets up a call, typically a month before your wedding day to learn more about your family. We understand that every family is different, so your lead photographer will do their best to understand all of the dynamics before the big day.
  2. On the wedding day itself, there is a systematic and organized process. The process often starts with taking a large group photo of one side of the family (typically the bride’s side first). The photographer will then say something like, “please raise your hand if you are cousins. :)” Once hands are raised the photographer will tell those folks to go enjoy cocktail hour and will ask everyone else to stay. Another picture will be taken. The next announcement may be “Aunts and Uncles, you’re all set and can head to cocktail hour.” What is left at this point is your immediate family, their spouses and any grandparents.  As the crowd is narrowed down, we are able to capture more intimate groupings, such as grandparents, parents and siblings. This method ensures that everyone is photographed.  This same process will be repeated with the groom’s side of the family.

Here are the steps you can take on your end to ensure success: VERY IMPORTANT!

  1. Please talk to your parents or your closest family members! They have often waited their entire lives for your big day and may have a very different agenda for which picture combinations they are after. It is important to make sure everyone is on the same page.  It ensures happiness for all :)
  2. Before your wedding day, the key is to make sure the family knows exactly when they are needed, and where they need to be after the ceremony. You can have a perfect list, but if we are trying to find Uncle Joe, this causes a delay. As long as everyone is ready to go, we will be very fast and efficient, and make sure everyone is captured looking great! The smoother the family photos, the more time you have for romantic couples photos, and fun memorable shots with your bridal party. 
  3. To be efficient, we suggest designating one family member on each side of the family that knows everyone in your family that is to be in the portraits. They should be at the end of the aisle after the ceremony to make sure all the family stays. During the portrait shoot, the photographers will be focused on lighting, composition, backgrounds and giving direct for nice clean shots. If you can have one or two family members dedicated to checking off your photo list, that will ensure everything is captured for you. 
  4. Let your photographer know all of the unique combinations you want captured. Make sure to put that on a list for your dedicated family members to check off. Example: “I want a picture of my third cousin and my Aunt together in a picture with me.” These are shots we wouldn’t know to capture unless specified.
Both the groom and bride's side of the family come together for a full family photo
A groom and his bride pose with the groom's family.
Parents and siblings of the bride pose with the groom.
Mother and father take a photo with their daughter and her groom.
A young bride poses with her mom.
A bride's sisters play her bridesmaids for a day
 
Here is a very general list of potential family portrait combos:
 
○ Bride & Groom All family (both sides)
○ Bride & Groom, Bride’s immediate family :
○ Bride and immediate family :
○ Bride & Groom with Grandparents :
○ Bride with siblings :
○ Bride with Parents :
○ Bride & Groom with Bride’s Parents
○ Bride & Groom with both of their parents :
○ Bride & Groom, Groom’s immediate family :
○ Groom and immediate family :
○ Bride & Groom with Groom’s Grandparents :
○ Groom with siblings :
○ Groom with Parents :
○ Bride & Groom, with Groom’s Parents :
 
*Please let us know about any special family dynamics, including any step parents or siblings that should be accounted for, or people that may not be present
*Please feel free to add in any cousins, aunts, uncles or any other guests of importance that you’d like a formal portrait with, keeping in mind that each group typically takes 2-3 minutes to photograph

Here is a link to check out more family wedding portraits photographed by our studio!
Check this out : Portrait Photography San Diego